December 01, 2025
Travel Photography Gallery with Lightweight CMS
A full-stack travel photo gallery that showcases photos from my travels to family and friends. The application features a custom admin dashboard where I select photos directly from Google Photos using their Picker API, add location metadata, and upload them directly to my site.
Recently I embarked on a journey to Nepal to do the Manaslu Trek. It was a wonderful adventure filled with angelic mountains, bewitching waterfalls, and magnificent wildlife. As someone who travels a lot, I'm always being asked by my family and friends to send pictures, and I've always struggled picking the top ones to send to each individual. I decided to make a travel photo gallery to solve this issue.
The Problem
While traveling I take hundreds of photos — some good, most bad — and I wanted a place where the good photos could live that were easy to send to friends and family. With the chaos of traveling, I often forget to send pictures. I decided that making a website where all my good photos lived would be the perfect solution.
When asked for photos, I could simply send a link that would open to my most recent photos. The user could then look at other photos based on continents to see where else I've been. When clicked, the photos would show some information, such as location, date, and a caption. I could also implement a newsletter that would notify family when I posted new photos.
The biggest issue would be updating the website. I knew if I didn't build that process into the website itself, I would never keep it updated. That led me to my goal: Create a photo gallery website with easy-to-use image upload and metadata.
Design Approach
First, I started with brainstorming features for my website. I came up with the following list.
FEATURES
- Easy way to upload photos
- Photos filtered by location, displayed in a way for easy browsing
- Photo information such as date, location, and a description
- Notification system that emails a user when new photos are uploaded
I then opened Figma to design something that fit these requirements. I decided to go with a sidebar containing all site navigation, and on the right, a masonry grid of images filtered by continent. When you click on a photo, a lightbox appears with photo metadata including date, location, and a description. I then added a "join the newsletter" section at the bottom, where a user could input their email and receive notifications when I upload new photos. This design checked most of the boxes for my initial feature list, so once I felt comfortable with it, I started to code.
Technical Approach
As mentioned in the design approach, an easy way to upload photos was a key feature. Since all of my travel photos already lived on Google Photos, I wanted to find a way to sync them to my website.
Approach #1
While browsing my Google Photos with developer tools, I found that public Google Photos links expose image previews in their raw HTML. I was able to write a React component that took a public Google Photos album URL and returned the associated images from that folder. I could add photos to my public album and they would instantly show up on my site.
export default async function GooglePhotosAlbumFetcher({ URL }: { URL: string }) {
  const response = await axios.get(URL)

  const regex = /\["(https:\/\/lh3\.googleusercontent\.com\/pw\/[a-zA-Z0-9\-_]+)"/g

  const responseText = typeof response.data === 'string'
    ? response.data
    : JSON.stringify(response.data)
  const matches = [...responseText.matchAll(regex)]
  const uniqueMatch = [...new Set(matches)]
  const urls = uniqueMatch.map(match => match[1]).slice(0,-2)

  return(
    urls.map(url => {<img src={url}/>})
  )
}
Although the functionality worked great, I ran into a lot of flaws with this first iteration. The biggest one was image quality — the public Google Photos HTML only contains preview-sized images, so they showed up grainy when blown up. Another flaw was that I couldn't access any photo metadata, which was another core feature I wanted. This meant I'd have to find another approach.
Approach #2
If I wanted to continue using Google Photos as my source, I needed a new way to access the photos. After some research, I found I could use the Google Photos Picker API, which lets users select and upload their own Google Photos into an app. I'd then need a way to store the images after retrieving them, which led me to setting up a PostgreSQL database with Supabase. I ran into another issue there: Supabase's free tier only allows 1GB of storage, and since I planned to have over a hundred photos on my site, I knew that wouldn't be enough. I decided to create an S3 bucket to hold the actual images, and store the S3 key and photo URL as references in the database instead.
Challenges
Learning APIs
This was my first time really working with APIs, and Google's Photos API documentation was not built for beginners. The learning curve was steep, but once I understood the basics of how to create, read, update, and delete records through the API, the rest started to click — including learning Google's OAuth structure well enough to actually authenticate my requests.
OAuth
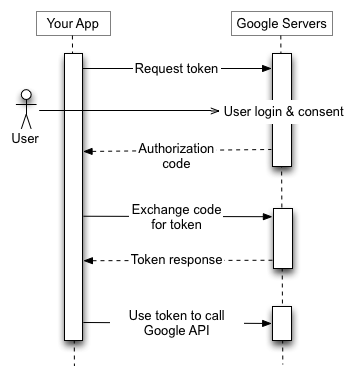
To get the Google Photos API working, you have to set up their OAuth flow — a complicated process, but the diagram below of Google's OAuth documentation made it click for me. You first request a token from Google's servers. Next, the user enters their credentials and receives an authorization code. You save this code and use it to make another call to the server to exchange it for an access token. An authorization code can only be used once, but the resulting OAuth token is valid for 60 days, with refresh tokens lasting up to a year. Once you have the token, you can call the Google Photos API.
Supabase and AWS
Once I got the Google Photos API working, it was time to upload the photos into my database and S3 bucket. I first needed to design a table schema. I decided on the one below:
[INSERT SCHEMA TABLE/IMAGE HERE]
Iterations
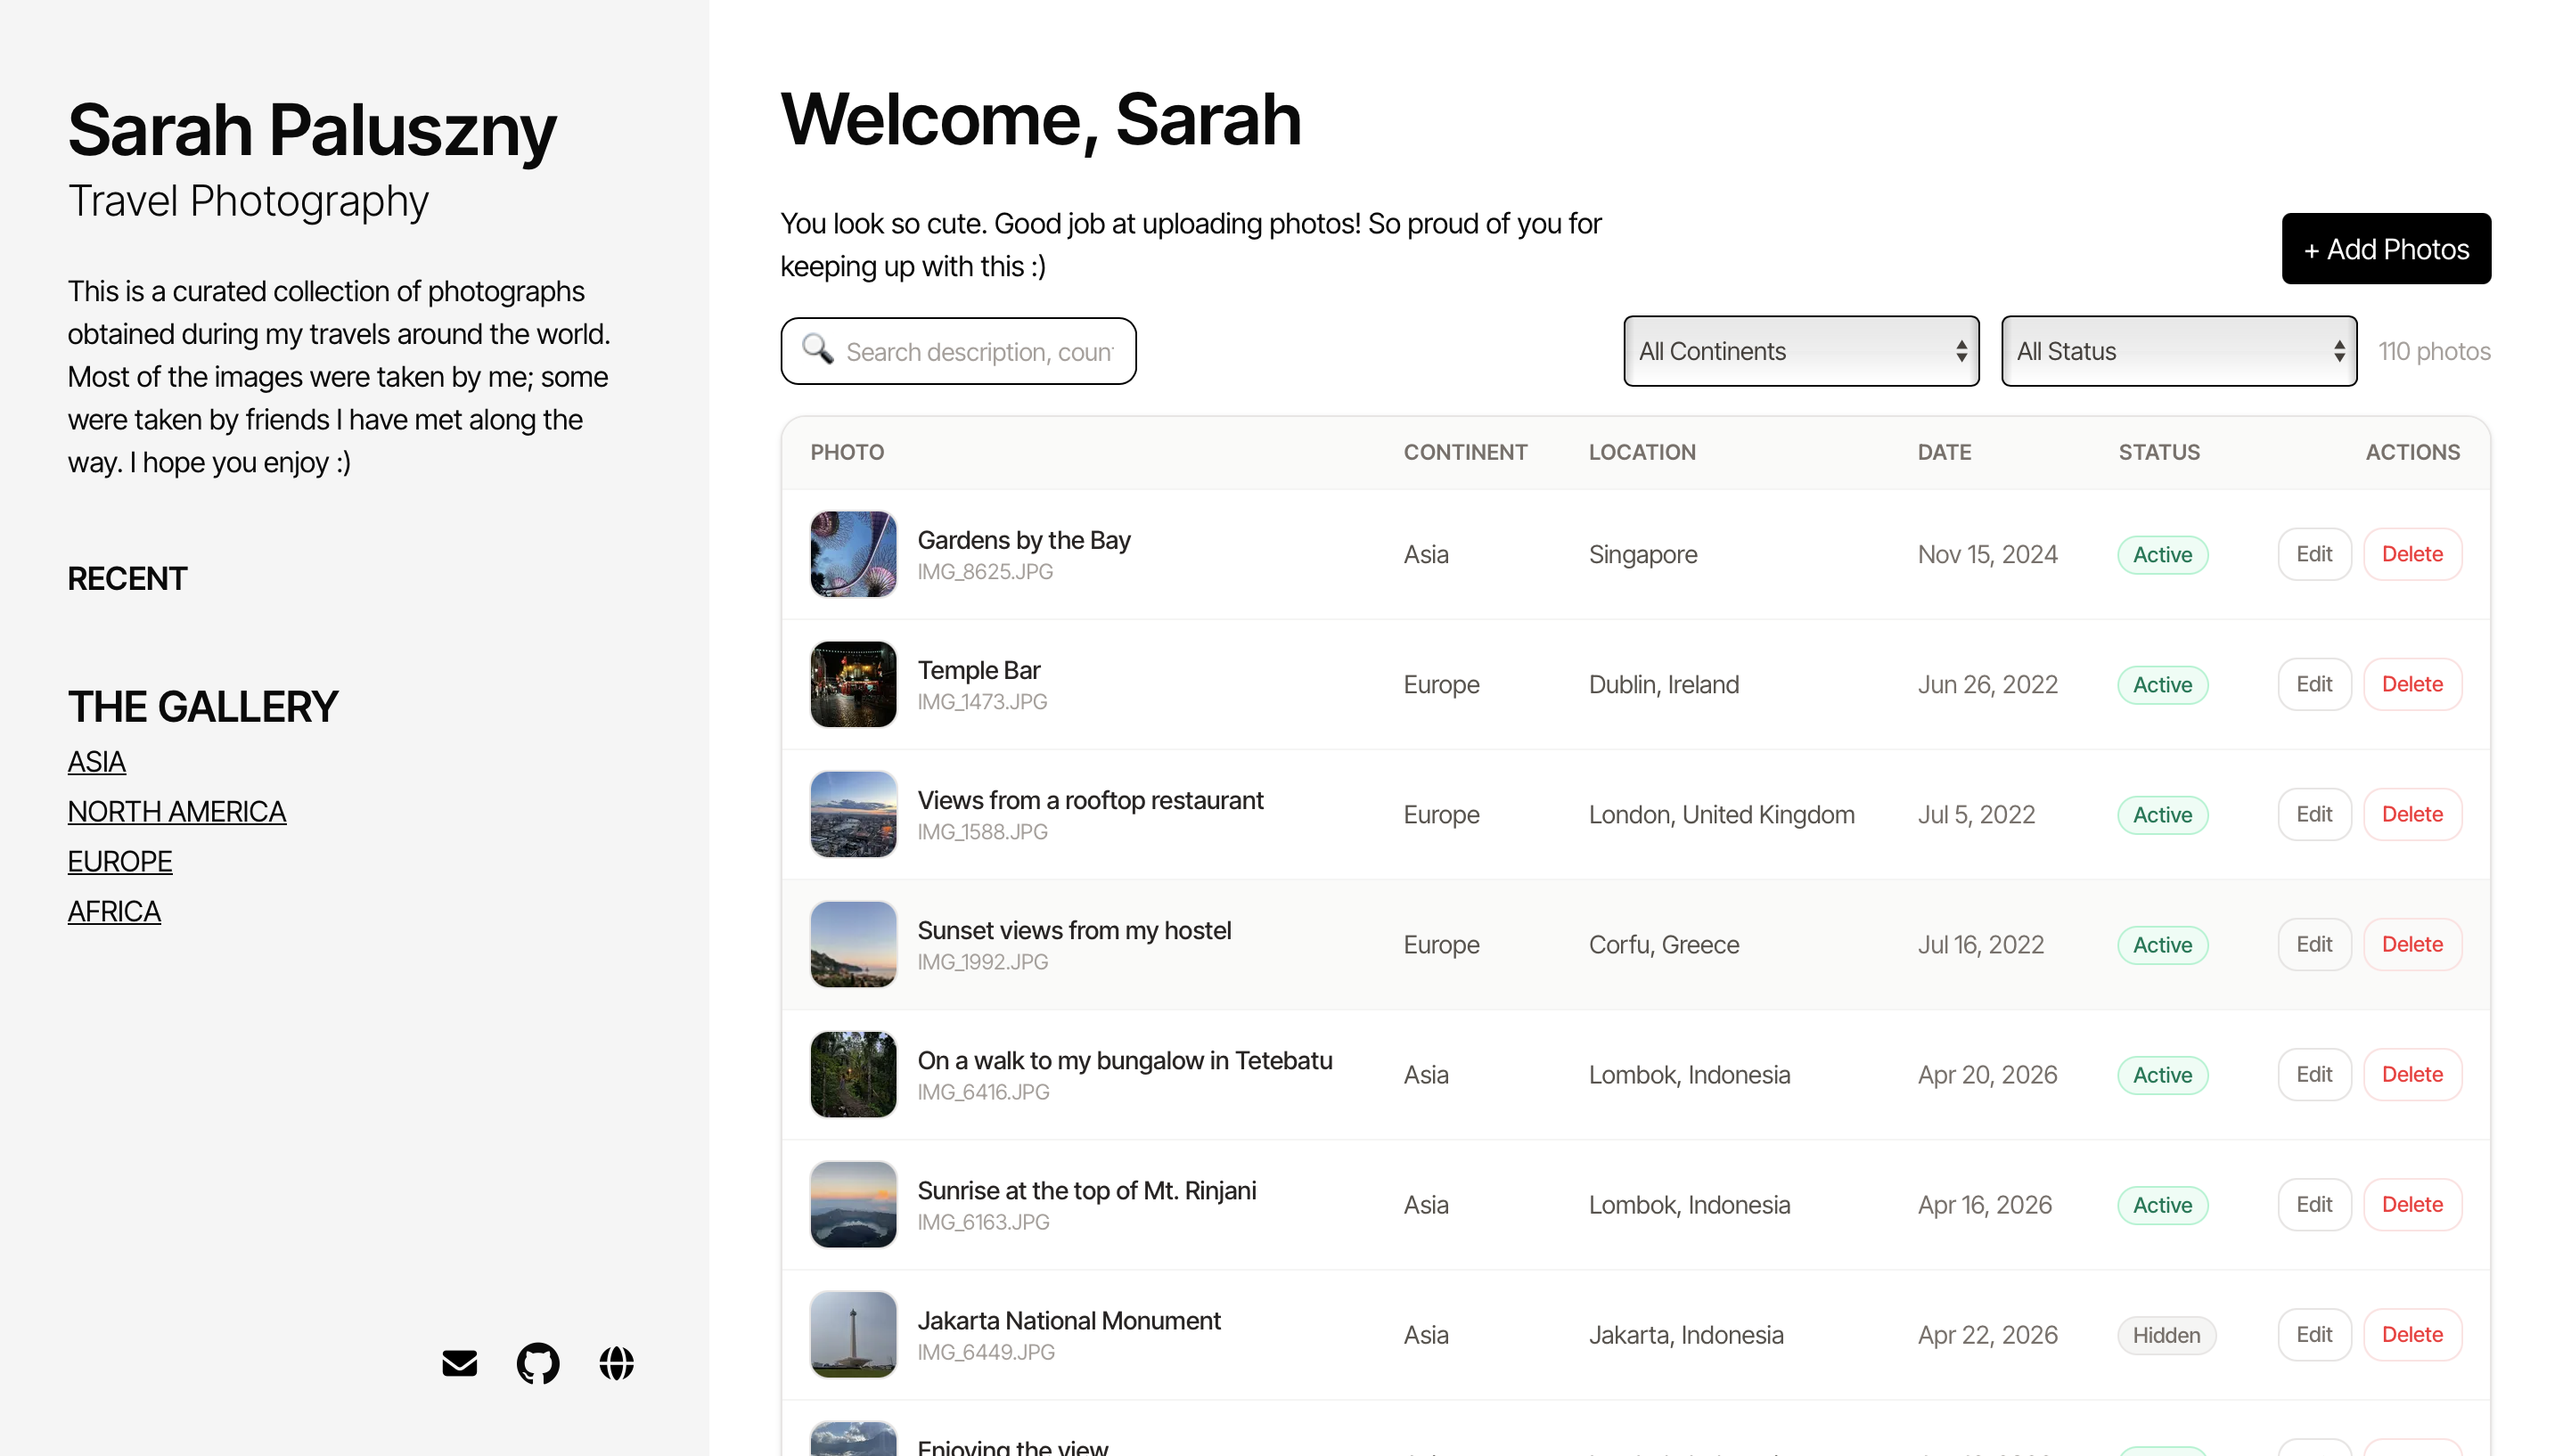
As I continued using the site, I found it difficult to manage the photos that were displayed. Every time I wanted to take a photo down, I'd have to look through the database, double-check it was the correct photo by opening the S3 link, delete the row, and delete the photo from S3. This got old quickly, so I decided to build a lightweight CMS to help me manage the photos more easily.
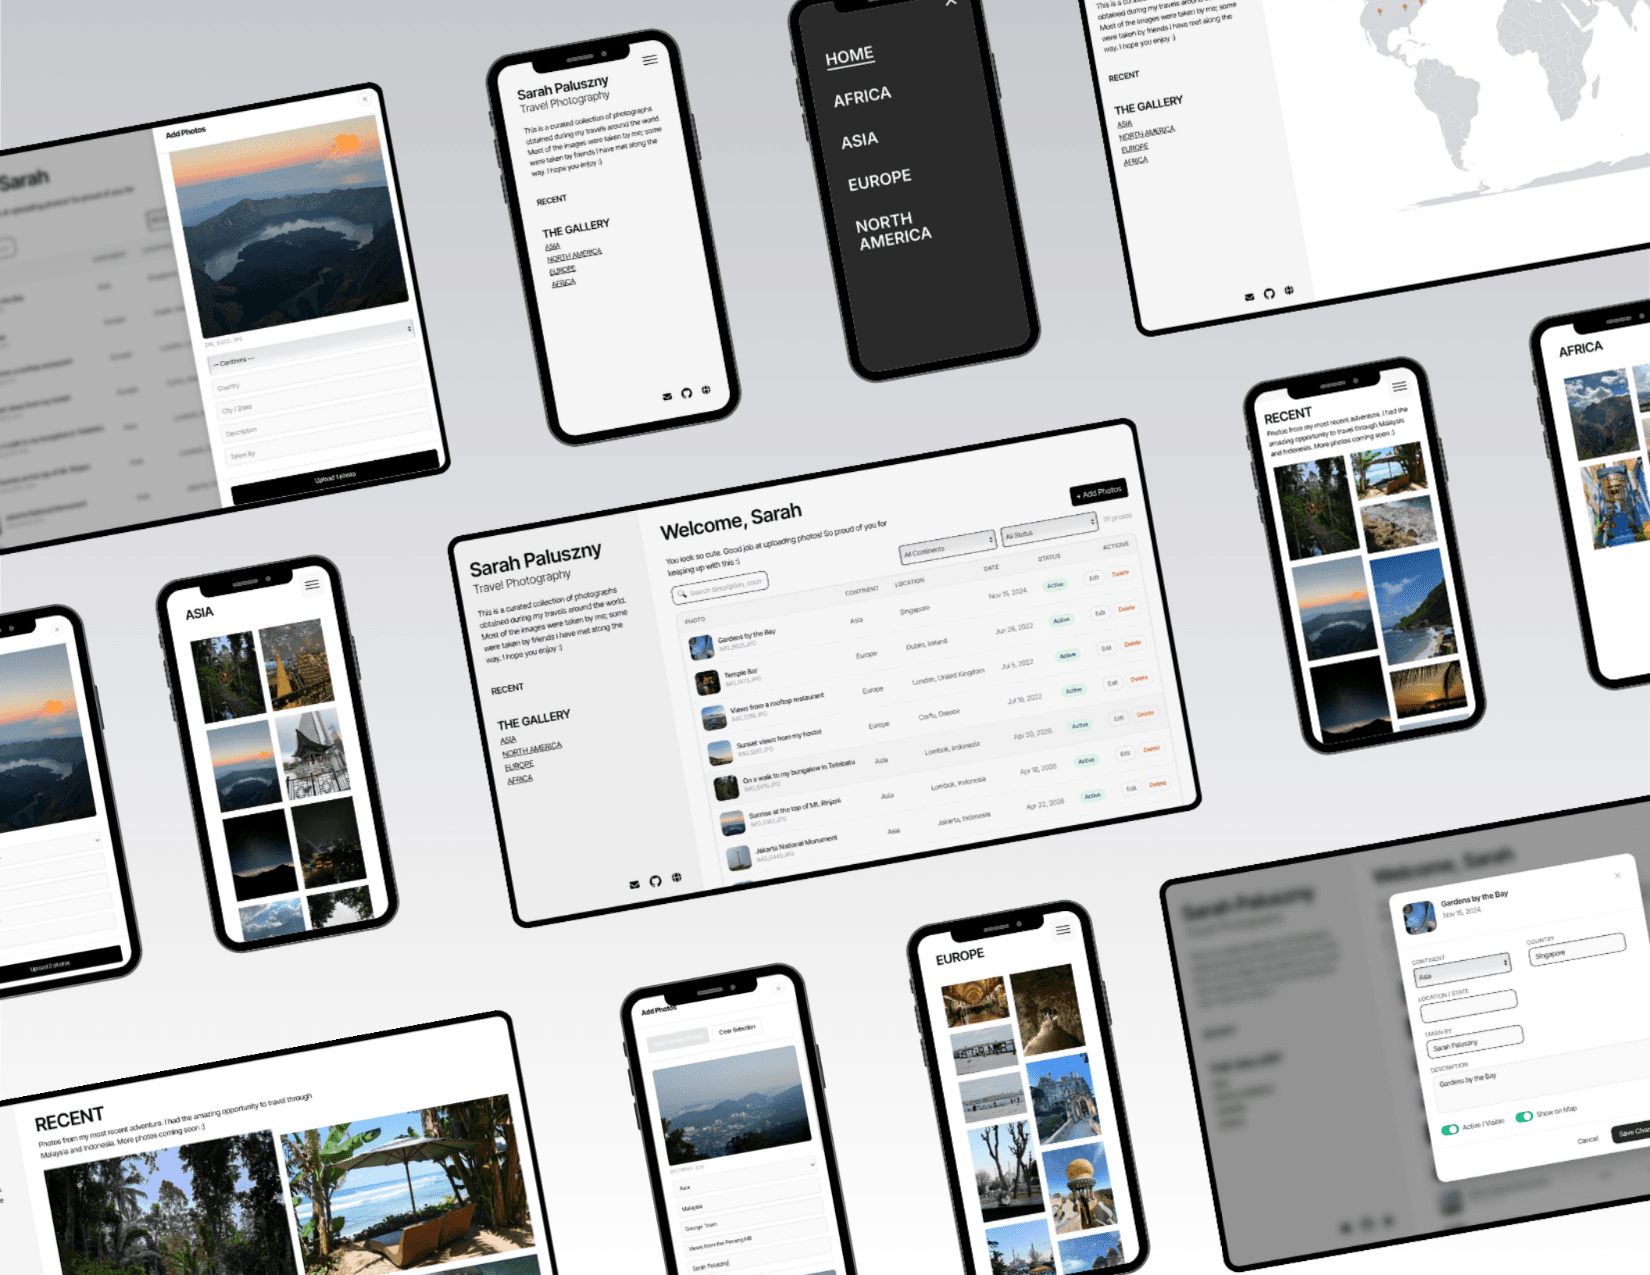
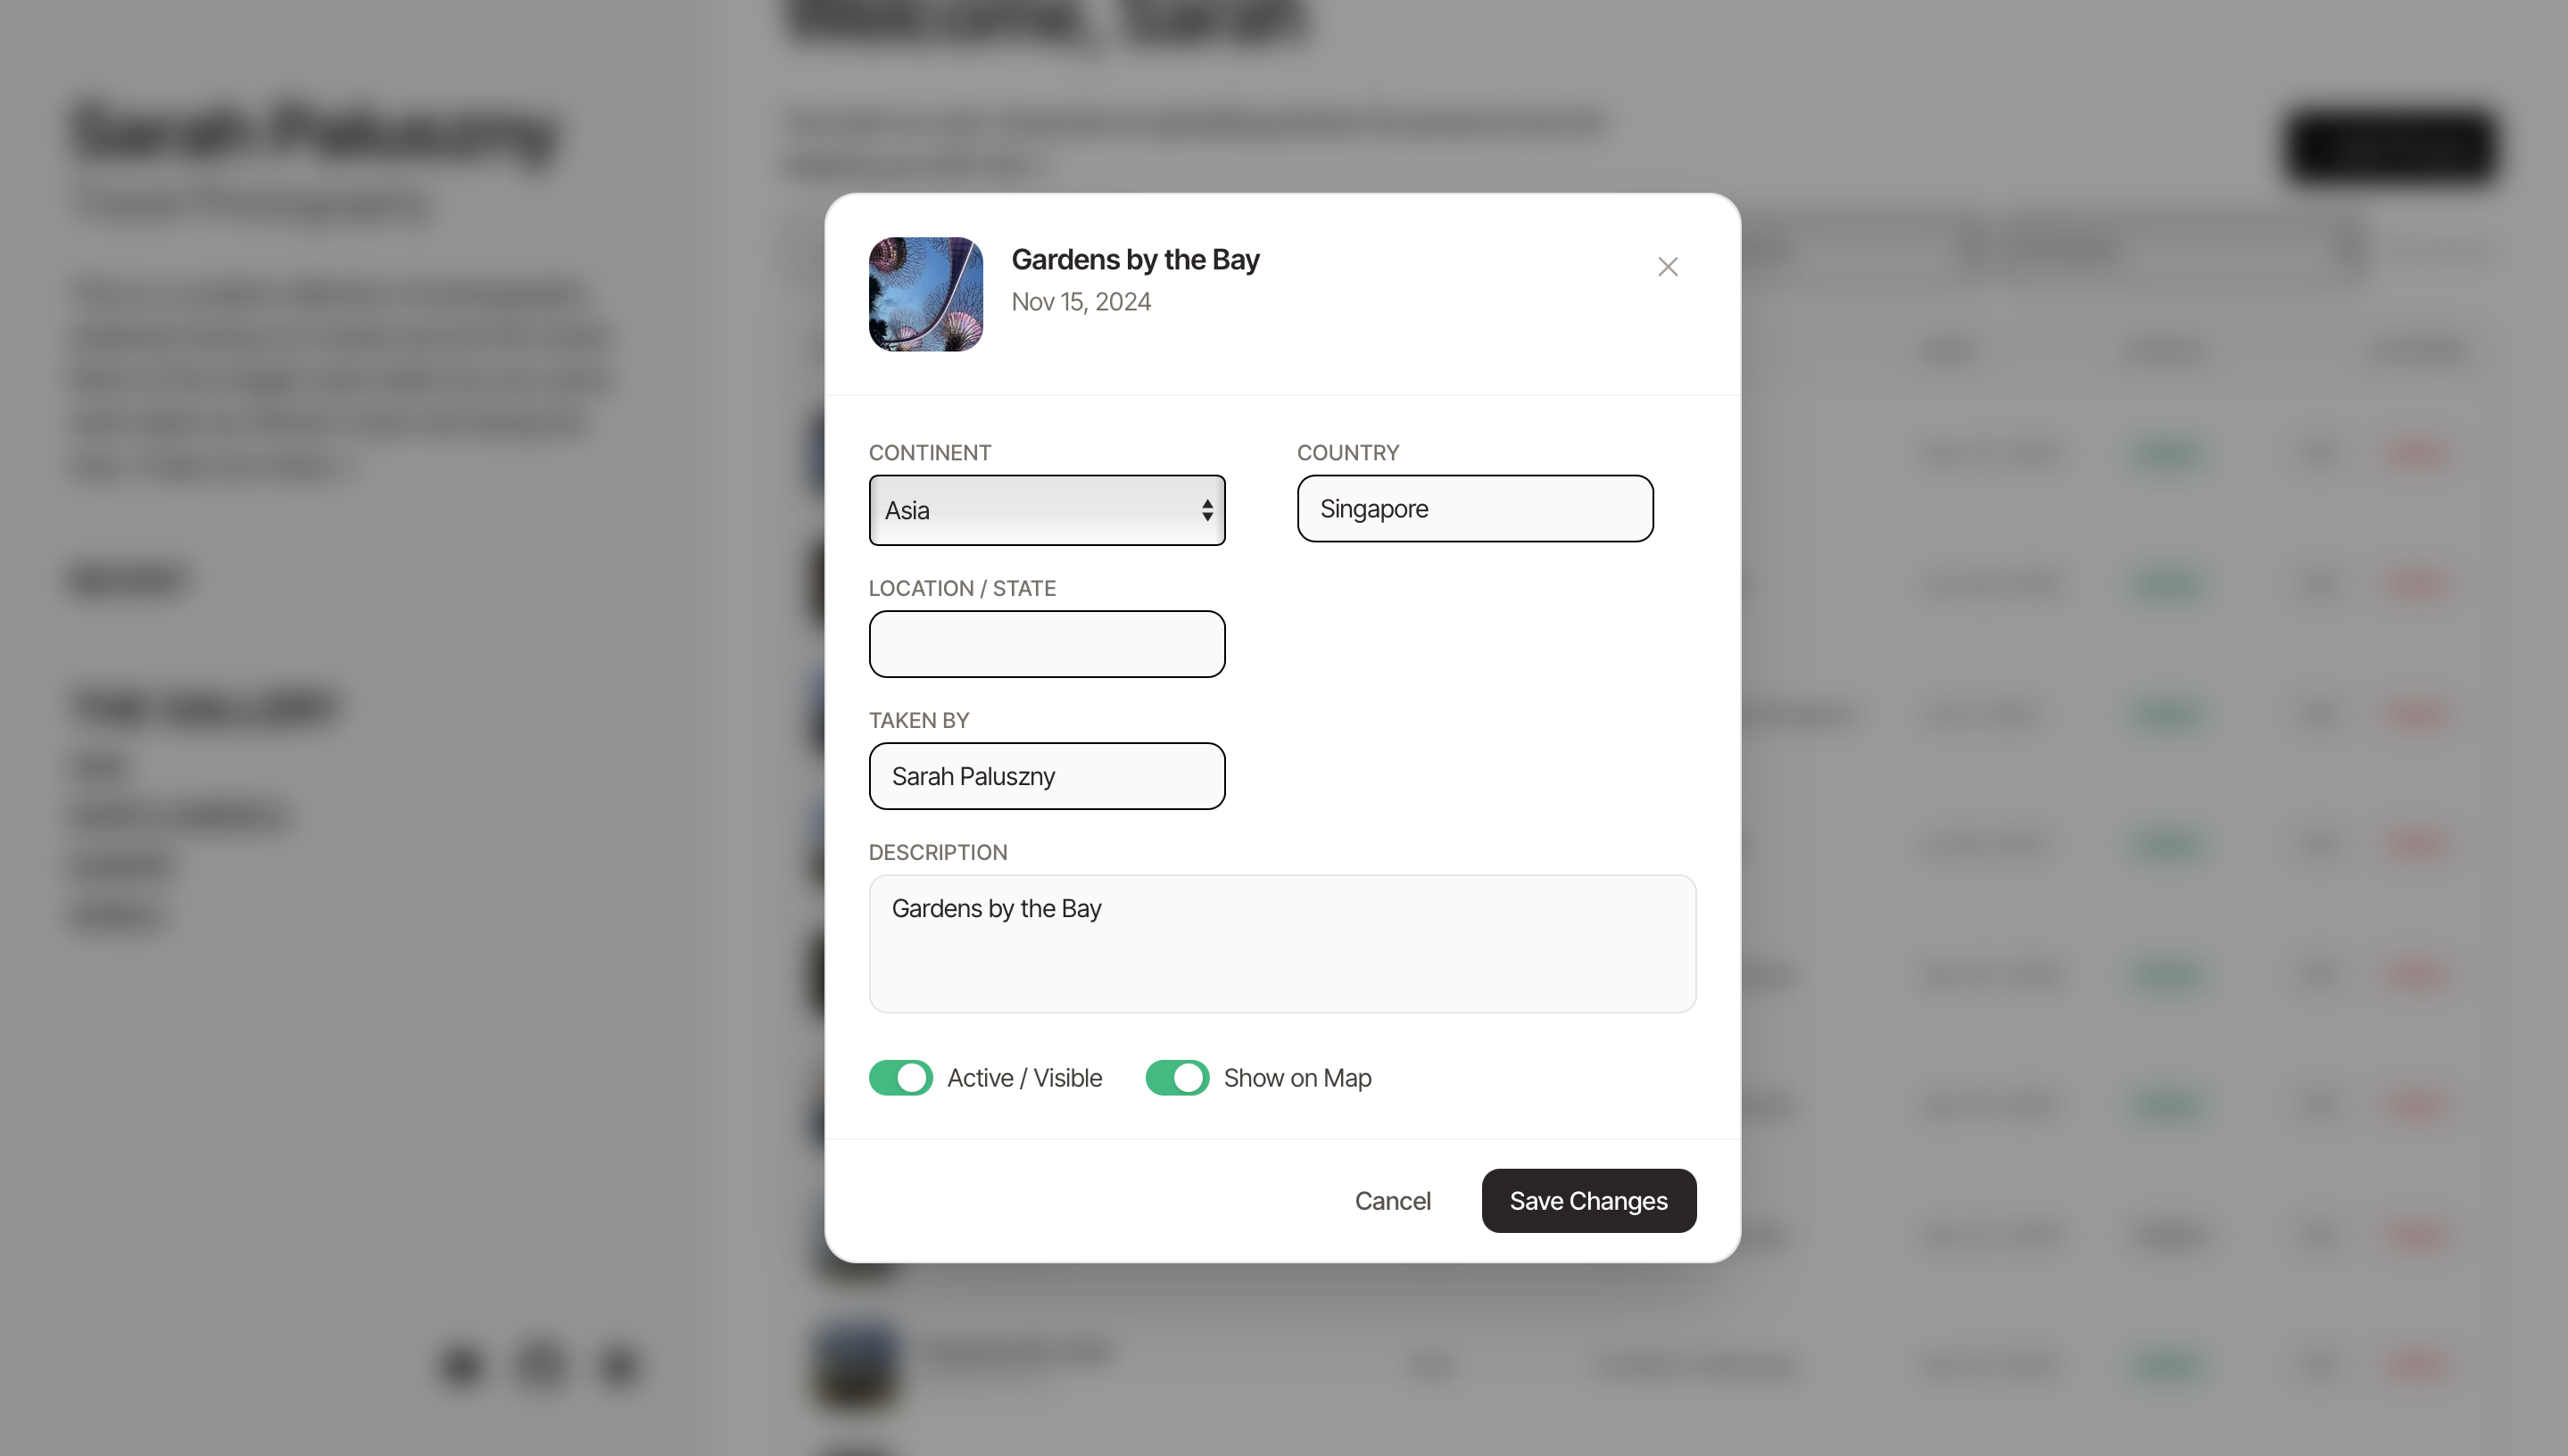
As pictured below, the CMS allows me to easily manage and update the photos on my travel gallery.
Results
In the end, I created a photo gallery website that made it easy to upload and manage photos. I learned how to make and structure API calls, how OAuth authentication works end-to-end, and how to work with cloud databases like PostgreSQL and Supabase. I set up my first-ever AWS account, which I'm sure I'll use again as I continue building more complex projects. Most importantly, I got an easy way to share my travel adventures with the people I love.